Original OEM Van Seat-Single
Original OEM Van Seat-Single
Couldn't load pickup availability
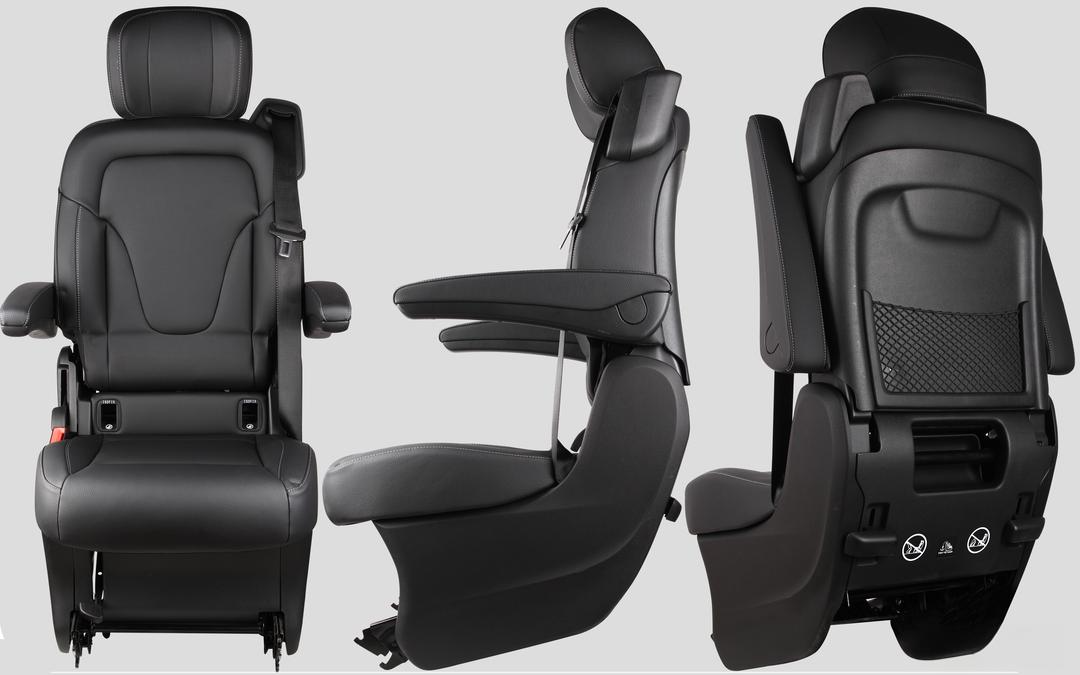
High-Quality Mercedes Benz Metris Seats – Perfect for Camper Van Conversions
Upgrade your van or camper with premium, brand-new Benz Metris seats, designed for use in Sprinter, Transit, bus conversions, or other camper van projects. These seats are ideal for those looking for comfort, safety, and flexibility during their adventures.
Product Dimensions:
-
Width (without armrest): 19 3/4 inch (50 cm)
-
Width (with armrest): 24 1/2 inch (62 cm)
-
Seat Height: 17 inch (43 cm)
-
Length (when folded): 25 1/4 inch (64 cm)
-
Height (when folded): 22 7/8 inch (58 cm)
-
Width of Two Tracks (Centre to Centre): 17 inch (43 cm)

Key Features:
-
Child Seat Ready: Equipped with standard child seat mounting anchors for enhanced safety.

-
Removable Design: Seats are easily detachable, offering maximum flexibility for different setups.

-
Foldable: The convenient foldable feature ensures compact storage or provides additional space when needed.

-
Adjustable Recline: Enjoy superior comfort with an adjustable reclining feature, perfect for relaxation during long trips.

Transform your vehicle into a comfortable and safe travel space with these high-quality seats!
Installation Guidance:
(Applicable for Both Single and Double Seats)

1. Determine Rail Position
Place the rails in the desired installation position.
Important Note: Before placement, carefully inspect the underside of the vehicle floor to ensure there is sufficient space for bolts and nuts to be properly secured.
Critical Reminder: Ensure there are no essential structures such as fuel lines, electrical wiring, or cross beams beneath the drilling area to avoid safety hazards or vehicle damage during installation.
Also, make sure the distance between the rails matches the locking width of the seat base to ensure a proper and secure fit.

2. Drill Holes
Drill holes in the vehicle floor at the positions corresponding to the pre-drilled holes in the rails.
Ensure the hole positions are precise, and that the diameter matches the fixing holes on the rail for accurate alignment.

3. Secure the Rails
Use bolts and nuts to securely fasten the rails to the vehicle floor.
Installation Tip: When tightening the nuts underneath the vehicle, it is recommended to use washers or larger load-distributing plates to enhance strength and safety.
Rust Prevention Tip: After drilling, apply anti-rust paint to the exposed metal edges around the holes to prevent corrosion and extend the service life.

4. Install the Seats
Insert the seat onto the installed rails and ensure it locks securely.
When the seat is not needed, it can be easily removed to free up interior space.

Additional Notes
If the vehicle floor has already been finished or covered, you can cut grooves in the flooring to embed the rails flush with the floor surface.
This not only improves the overall appearance but also reduces the risk of tripping over protruding rails.
Disclaimer
Users are solely responsible for ensuring that the installation complies with local vehicle and traffic regulations.
The seller is not liable for the compliance, installation, or usage of the seats after purchase.